Showing posts with label Chain Case. Show all posts

Friday, April 3, 2015

1957 Raleigh Dawn Tourist

The owner of this 1957 Raleigh wanted to get this classic back on the road for leisurely rides to the local post office.  This bike has the larger 23" frame, rod brakes, enclosed chaincase, 3-speed Sturmey Archer "AG" rear Dynohub (dated October 1957), and Brooks B-66 saddle.  A check of the Raleigh 1957 catalog indicates this particular bike with this equipment is probably a Dawn Tourist model. 

Unfortunately the front and rear lamps and Dry Battery Unit were missing.  The front brake pads and anti-vibration plates were missing, and the shifter cable anchorage was missing. The rear of the enclosed chaincase was mangled from the 18 tooth cog coming loose at some point.  The owner only wanted to get the bike in rideable condition and not disturb the patina (rust and dirt).

Since the bike was missing all of the lighting equipment is was determined to switch out the heavy, notchy "AG" hub for an "AW" hub and rims from a donor Raleigh Sports bike.  The rod brake pads were replaced and shimmed for proper contact with the cleaned and polished Westrick rims.  The chaincase was removed and straighten, the shifter cable anchorage and new indicator were installed, new 19 tooth rear cog installed, and all hubs cones adjusted.  After installing new tires, tubes and chain the old classic was again rideable and ready for the road. 


Monday, July 29, 2013

Putting it Back Together Again

I thought I had some extra tubes so I could get the tires mounted on the new wheels , but either I've used them or misplaced them.  So while I'm waiting on tubes I decided to start some of the reassembly.  I started with the bottom bracket.  When test fitting the gear case, I temporarily installed the original bottom bracket, chain, and cranks.  I cleaned and buffed the chainwheel and cranks, greased everything and installed them permanently.  I used new cotter pins, and replaced the bottom bracket fixed cup which was pitted and rust corroded.  I threaded the new chain through the gear case but did not cut it to length yet.  First I wanted to replace the standard 18T rear sprocket with a larger one to provide a more comfortable overall gear range.  I like the range a 22T sprocket provides with the AW gearing and 48T front chainwheel.  I wasn't sure how large a sprocket I would be able fit within the enclosed gear case.  Have both a 20T and a 22T.  I tried the 22T first and it seemed to have enough clearance, so I measured the chain and removed the excess links.

On the left is the original 18T sprocket, on the right is the 22T replacement


Bottom bracket, cranks, and chain installed, with 22T rear sprocket

Installing the headset was next, I cleaned and buffed the top and bottom cups and fixing nuts.  Re-greased the cups and installed the 50, 5/32" loose ball bearings, 25 in each cup.


Pressing in the top and bottom cups with homemade press

Cups in place

Bottom cup with 25 loose balls

Top cup

The front fork is now installed, just realized I also need to install the lamp bracket.
I wanted to start working on replacing for the original fenders (mudguards).  Half of the original rear fender had been sawed off, and both were in poor general condition.  I have a couple possible options, I can use the fenders from the 1970 Sports that I will be using for the path racer project; however, these are green.  I also have some NOS black Raleigh fenders  but the do not have the fender stays attached.  I could clean up the original front fender,  and just use the rear NOS fender.


  I'm interested in trying to use the NOS fenders because I have several sets of these in various original Raleigh colors, but none have the stays attached.  I have some new Wald fender stays that may work with some modifications, and paint.  So, I'm going with this option first.  Here's a picture of trial fitting of  NOS fenders with out the tires.  Before I make final modifications and drilling of  the stays I want to an get the tires mounted to help establish a proper fender line with the tires.

Rear NOS fender with Wald stays attached

Front NOS fender with stay located under axle nut, need to shorten to attach to the fork eyelet instead.


It's starting to like a bike again, I have not decided about refinishing and painting.  I generally like keeping the original finish on classic bikes, but with a mix of NOS shinny fenders, wire brushed frame, and repo chaincase this one may need some attention.  I'm not going to worry about it right now, I just want to get everything back together and put some miles on it before deciding anything.

Please comment and share your experiences.

Friday, July 19, 2013

Replacing the 1953 Raleigh Sports Chaincase

I've never had a bike with an enclosed chaincase.  I've heard many complaints from those who have concerning fixing flats, removing the rear wheel, perform chain maintenance, being noisy, etc..  I suspect I will experience these problems over time, but for me the enclosed chaincase adds so much appeal to the classic three-speed it will be worth it.  Sometime in the history of this bike the lower portion of the chaincase was sawed off; in addition, the "pie plate" and rear cover were missing.


Locating an original Raleigh Sports chaincase proved to be difficult and costly.  I was able to find a repo version online at the Yellow Jersey.


 I was skeptical about using a repo because of potential fitment problems.  I will continue my quest of finding an original but for now I need to make this repo work.  The original case still had the rear bracket and riveted on front bracket support behind the chainwheel.  I removed the rivets from the front bracket.


I then tried both brackets on the repo.  The back bracket aligned perfectly with the drillings in the repo.  The front bracket was close but I had to enlarged the center hole, which is the hole the small bolt passes through into the chainstay braze-on for the chaincase.
  
Rear Bracket

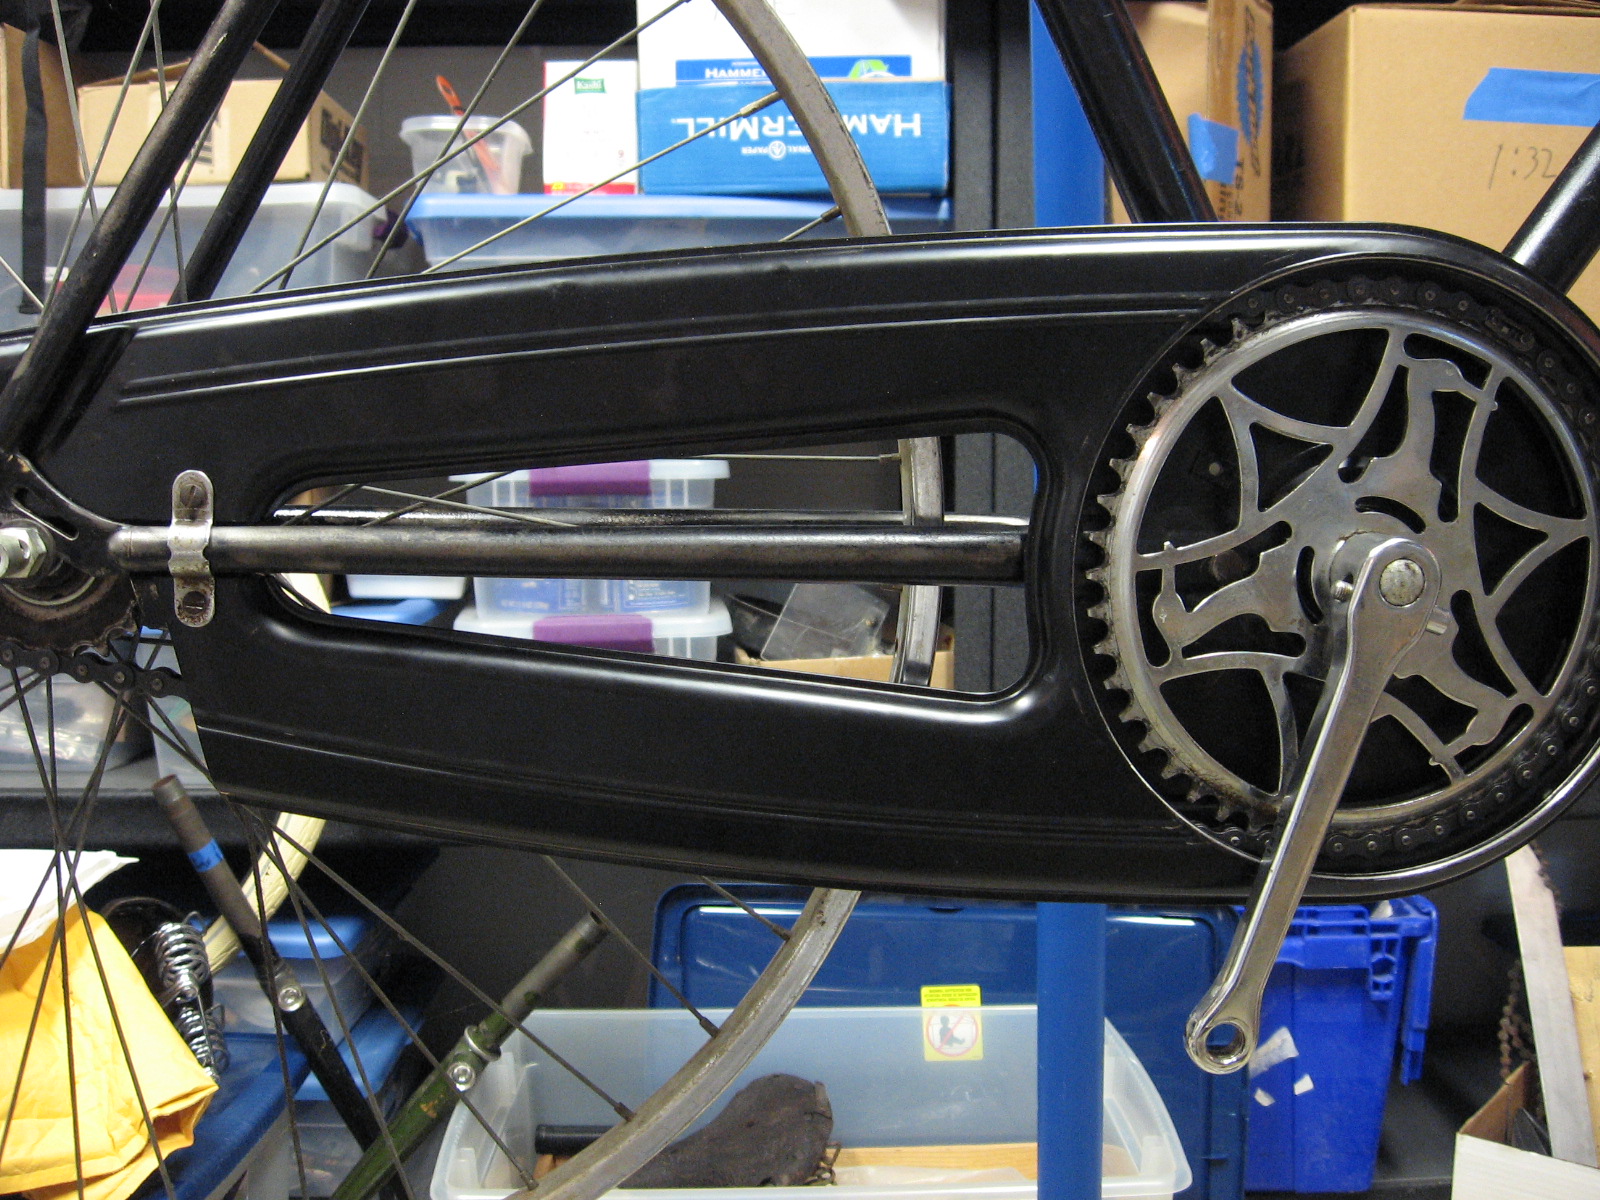
I then mounted the front bolt behind the chainwheel, chainwheel, and chain to check for initial fit.  Threading the chain through the chaincase is difficult.


I slowly turned the chainwheel checking for rubbing and interference with the case.  The chainwheel was rubbing on the front bracket, the chain was also rubbing the front portion of the case.  The rear of the case was interfering with the rear sprocket.  I marked on the chaincase were I thought additional bending would be need to add clearance.  I made some adjustments to the case.
Extra filing need on the radius

I had to deepen and extend the relief for the seat stay

This is the back of the case, I removed the inside front bracket and deepen the relief from the inside to make more clearance for the bolt.

I remounted the case and tried again, this time much of the initial rubbing had been eliminated, but there was still some chain rubbing. See separate Post on adjusting the chain line.  I then installed the rear cover and "pie plate".


This is the finished product.  I think the repo might work, but I have concerns that the "pie plate" might become a problem because its just a press fit into the chaincase and does not seem very secure.  Only actual riding will determine this.  I do think that once the bike is farther along and ready for its first ride I will fill the rear tube with "Slime" to discourage any flats.  I do not want to experience removing the rear wheel and fixing a flat in the field with the enclosed chaincase.

Please share your thoughts and experiences.