


Locating an original Raleigh Sports chaincase proved to be difficult and costly. I was able to find a repo version online at the Yellow Jersey.

I was skeptical about using a repo because of potential fitment problems. I will continue my quest of finding an original but for now I need to make this repo work. The original case still had the rear bracket and riveted on front bracket support behind the chainwheel. I removed the rivets from the front bracket.
I then tried both brackets on the repo. The back bracket aligned perfectly with the drillings in the repo. The front bracket was close but I had to enlarged the center hole, which is the hole the small bolt passes through into the chainstay braze-on for the chaincase.
 |
| Rear Bracket |
I then mounted the front bolt behind the chainwheel, chainwheel, and chain to check for initial fit. Threading the chain through the chaincase is difficult.

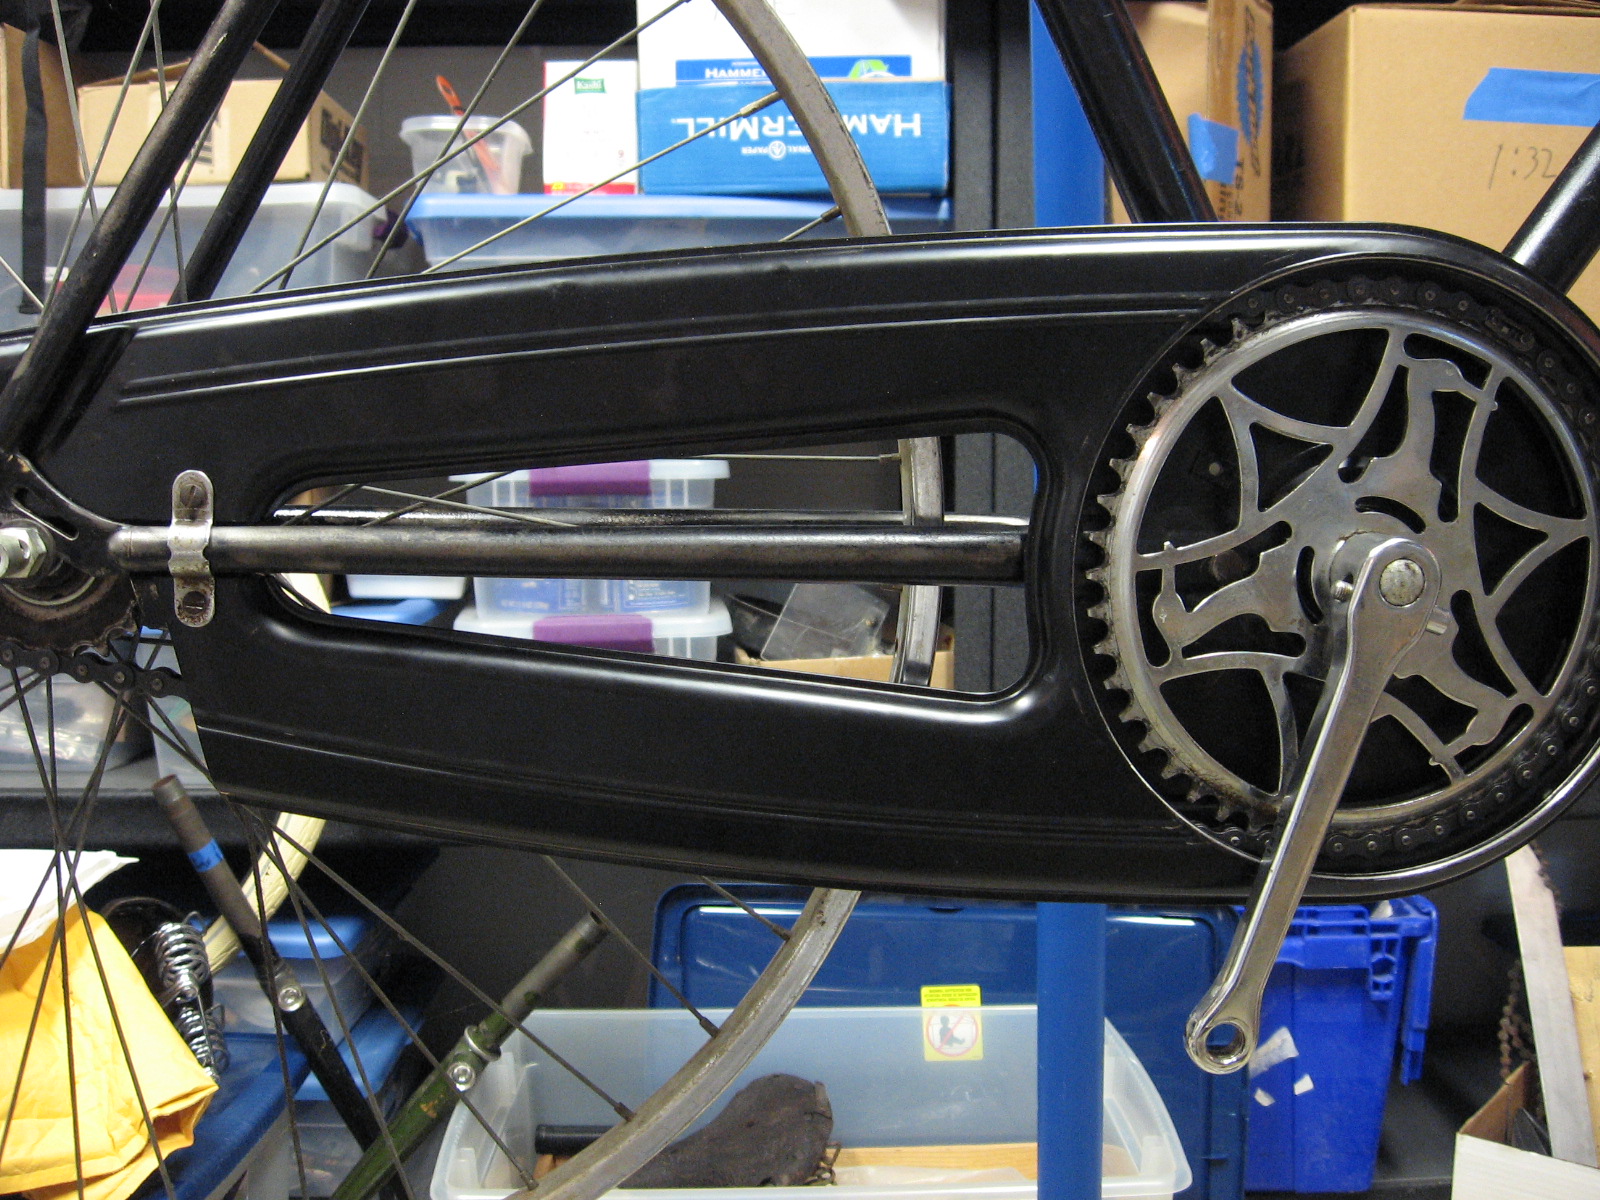
I slowly turned the chainwheel checking for rubbing and interference with the case. The chainwheel was rubbing on the front bracket, the chain was also rubbing the front portion of the case. The rear of the case was interfering with the rear sprocket. I marked on the chaincase were I thought additional bending would be need to add clearance. I made some adjustments to the case.
 |
| Extra filing need on the radius |
 |
| I had to deepen and extend the relief for the seat stay |
 |
| This is the back of the case, I removed the inside front bracket and deepen the relief from the inside to make more clearance for the bolt. |
I remounted the case and tried again, this time much of the initial rubbing had been eliminated, but there was still some chain rubbing. See separate Post on adjusting the chain line. I then installed the rear cover and "pie plate".

This is the finished product. I think the repo might work, but I have concerns that the "pie plate" might become a problem because its just a press fit into the chaincase and does not seem very secure. Only actual riding will determine this. I do think that once the bike is farther along and ready for its first ride I will fill the rear tube with "Slime" to discourage any flats. I do not want to experience removing the rear wheel and fixing a flat in the field with the enclosed chaincase.
Please share your thoughts and experiences.
The whole process is basically trial, error, and fitting. Even with an original, you're in for a fair amount of work. I located mine on a scrap bicycle and parts website for a few dollars, but had to do a repaint. In the end it still took a substantial amount of fitting and adjustment. The size of the chain and cog play a role, as well as the lateral spacing of the on the dished rear cog. The key is not to freeze up and suddenly assume it won't work if you hit bumps. If you press on and keep adjusting, things eventually should fall into place.
ReplyDeleteThe front dish is a press-in, even on the originals. It seems often like it won't hold, but if you get it to "pop" it should stay put.
The rear wheel should be able to be removed with the chain case on the bicycle. The hole in the chain case appears to be under and forward of the rear wheel. It should roughly track with rear drop such that you "should" be able to change a flat without removing the chain case.
Thanks for the info and words of encouragement, only when I get the bike back on the road will I know if using the repo was worth the time and effort. I'm now following your blog thanks for the link, looks like a lot of good info there, It will give me something to read today. I noticed that you used a larger rear sprocket with your chaincase, do you think there is enough room for a 22 tooth cog?
DeleteHi
ReplyDeleteHow have you been getting on with your project? I have a 1959 Raleigh sports which needs work, so am especially interested!
Finished the project about a year ago, much fun and rides great. There are some pixs of the completed bike in the later blog posts. Good luck with your 1959. Does it have a enclosed chaincase?
DeleteThis comment has been removed by the author.
DeleteHey! I just completed a '58 Sports last summer. First bike I'd ever "restored" (in quotes because I didn't need to replace any major parts) but it came out nicely. What sort of work does your Sports need? I know I may be a complete stranger, but feel free to message me if you want any specific pointers. Bear in mind the one part I did not service was the bottom bracket - didn't have the tools.
DeletePics and stuff here if you want to look: http://stuffjaydoesforfun.blogspot.com/search/label/Restoration
I recently purchased a 1952 26" wheel, cable brake, Lady's English (non Raleigh) 3 speed bicycle in original British Racing Green color from a local ad in Craigslist. The frame and fender style looks like those used in the 1930's-1940's, as it uses a rear entry for the 3 speed axel as well as axel tensioners for both sides. The frame also has the removable diagonal rear frame sections, like Raleigh used on their early bikes as well as the fully rounded fenders. I decided to give the bike an earlier look by adding a replaca rear drop down kick stand, an English Prestube rear carrying rack with a wicker basket attached to it, a Brooks leather saddle and an original fully enclosed Raleigh Superbe chain guard, in the same BRG color, that I purchased on Ebay UK.
ReplyDeleteMy only problem is this vintage bicycle did not come with any mounting boss for mounting the chain guard's front bolt, that should be located behind the front chainwheel. I am contemplating securing a proper size metric nut, using JB Weld, to the area behind the chainwheel. Any other ideas would be welcomed. Also, what metric size should the bolt and threaded boss be?
The only thing I can recommend is to fabricate some type of clamp on bracket the would work with your bike and guard. I don't know if you have access brazing equipment but that would be your best solution.
DeleteI like the idea, full chain case is the best for chain, sprockets for long life of them inside the case chain remains clean you can lube it as required without removing any parts if there is a hole of the top of the case with a plug. plus neat look. two of my bikes i have modified , the chain runs on oil bath no leaks silky smooth 7000 kms original chain no rocket science.
ReplyDeleteJust in the process of renovating a Raleigh Sports Model 1950 Terry saddle king of the road bell, and enjoying it
ReplyDeleteThe cables are beyond repair not sure if they are ribbed cable or fabric coated cable they look the later any suggestions as to were I can get these from would be greatly appreciated
Steve
Chelsea or the Blues managed to drive themselves back from their woeful run under manager Guus Hiddink but due to their earlier drop, they failed to break into the top four. click here
ReplyDeleteCool
ReplyDelete